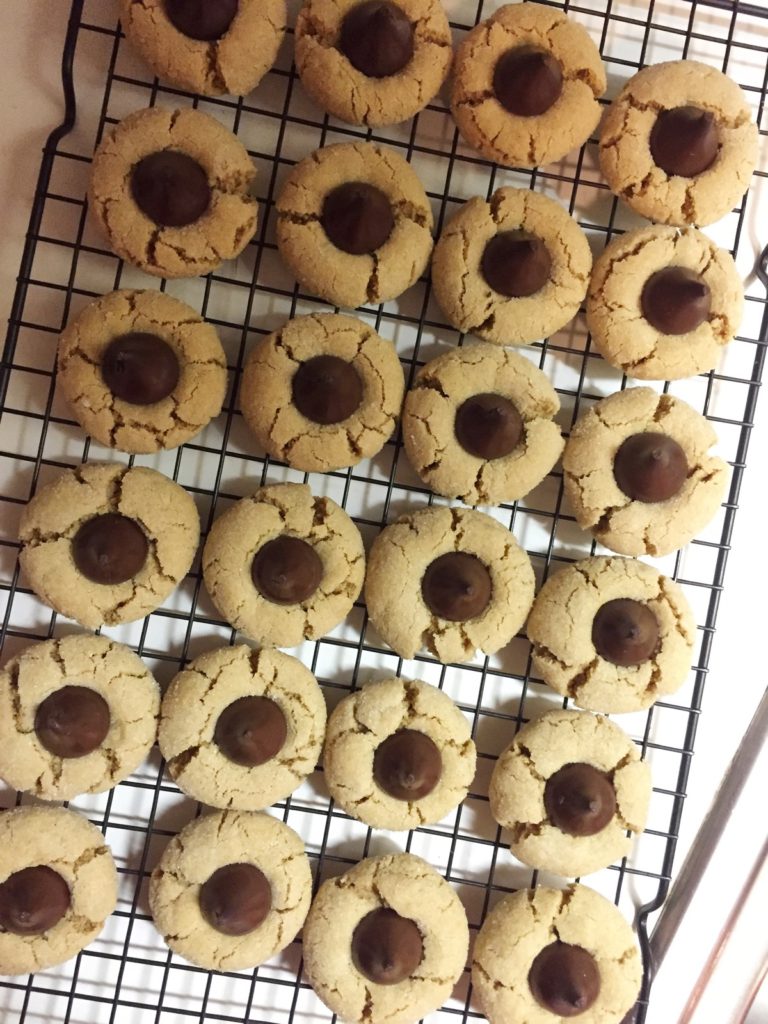
My favorite part of the holidays is definitely baking for family and friends. Since I had to start eating gluten free a few years ago I have loved the challenge of recreating some of my old favorites using gluten free ingredients. I adapted this gluten free peanut butter blossom recipe from the traditional peanut butter blossom recipe my mom used to make. Note: the Hershey kisses are not dairy free. However, if you need a dairy free alternative I recommend melting some enjoy life chocolate chips, create a little nest in the center of the cookie, and drizzle in the dairy free/vegan chocolate in for a vegan option.


Gluten Free Peanut Butter Blossoms
Ingredients
- 1 egg or 1 flax egg or egg replacer*
- 1/2 cup vegetable shortening
- 3/4 cup peanut butter
- 1/3 cup cane sugar
- 1/3 cup brown sugar, packed
- 2 tbsp unsweetened almond milk
- 1 tsp vanilla extract (gluten free)
- 1 1/2 cups Bob's Red Mill 1:1 Gluten Free Flour
- 1 tsp baking soda
- 1/2 tsp salt
- 1/4 cup granulated cane sugar for rolling
- 48 hershey's kisses (or non dairy chocolate chips)
Instructions
-
Preheat oven to 375 degrees Fahrenheit. Line a baking sheet with parchment paper.
-
If using regular eggs skip this step. If using an egg replacer: In a small bowl combine either 1 tbsp finely ground flax meal with 3 tbsp water OR 1 tbsp Bob's Red Mill Egg Replacer with 2 tbsp water and let sit for 2-5 minutes before adding to recipe.
-
In a large bowl or stand mixer cream together shortening, peanut butter, and sugars until fluffy. Add the egg or egg replacer, milk, and vanilla and mix thoroughly.
-
In a medium bowl whisk together the flour, baking soda, and salt.
-
Slowly add the dry ingredient to the wet until well incorporated.
-
Form dough into 1" balls and roll in sugar before placing on parchment paper lined baking sheet. Bake for 8-10 minutes until edges are just slightly brown.
-
Remove from oven and immediately press hershey's kisses into the center of each cookie*. The edges of the cookie will crack slightly, push the kiss in carefully. You can also use a 1/2 tsp measuring cup to make a dent in the center of each cookie and sprinkle enjoy life chocolate chips in, they will melt.
-
Let cool on baking sheet for about 5 minutes before transferring to wire cooling rack to cool completely. Store in an airtight container at room temperature for up to 4 days.
Recipe Notes
*if using non dairy chocolate chips I recommend using the end of a wooden spoon to depress the center of the cookie a little, then sprinkling a few non dairy chocolate chips in there and letting them melt/cool.
*You can make this recipe with a regular egg, a flax egg, or other gluten free egg replacer. To make a flax egg: mix 1 tbsp of finely ground flax with 3 tbsp water and let sit for 5 minutes before adding in the recipe.
*I have used both Bob’s Red Mill 1:1 gluten free flour and pillsbury gluten free flour in this recipe with good results.
Did you try this recipe? Make any substitutions? Let us know how they turned out in the comments below!
Want to share this recipe? Please link back to the original post here, tag @lizhurley_rd on Instagram and #lizhurleyrdeats!